Management Planning
It is recommended that a user complete Management Planning, AFC Documentation, Operating Profile and Record Book for a single vessel. It is beneficial to then register and complete similar vessels next which will add value in Importing Niches.
If you would like a pictorial guide on setting up a complete profile see our Vessel Check Guide for New Vessel Operators.
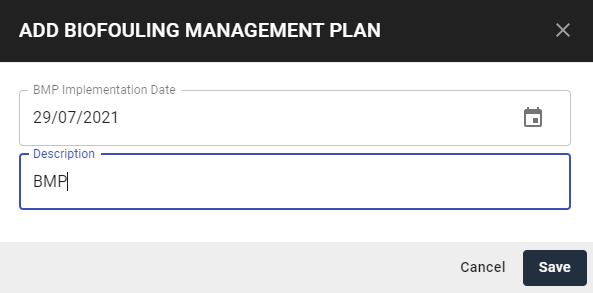
Add Biofouling Management Plan
Biofouling Management Plan Description
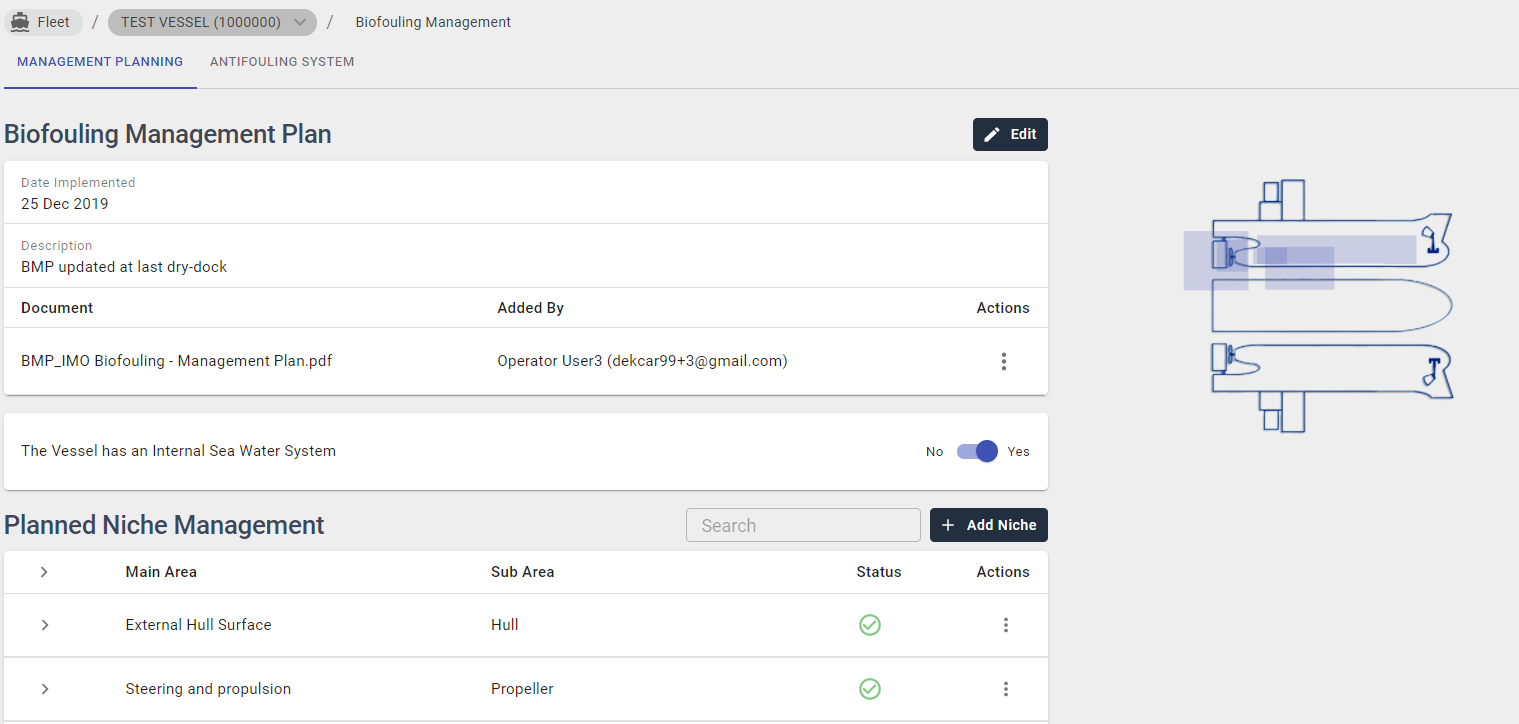
For each Vessel, one Biofouling Management Plan can be registered.
Register BMP will be displayed if no BMP has previously been created.
Step 1: To Add BMP the Implementation Date and Description must be edited first.

Step 2: To Edit Description and BMP Implementation Date. Click Edit.
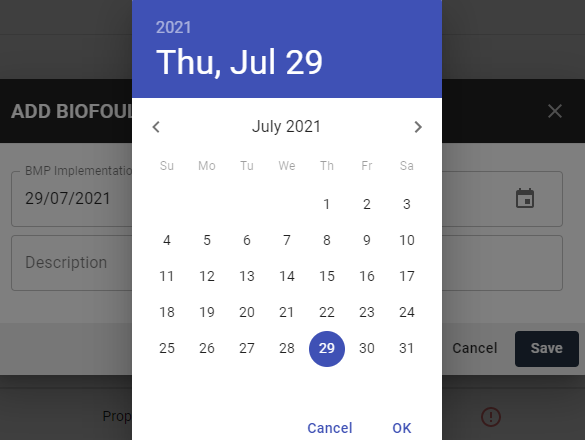
Select BMP Implementation Date box. Using the calendar Choose Date.
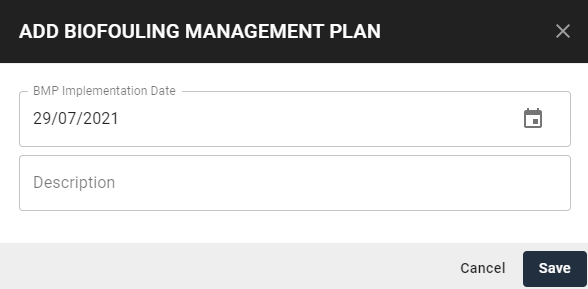
Step 3: Enter a Description. Click Save.
Step 4: Click Add.

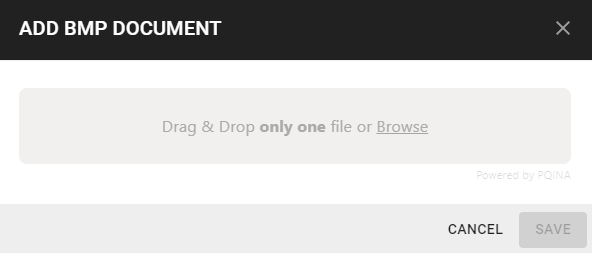
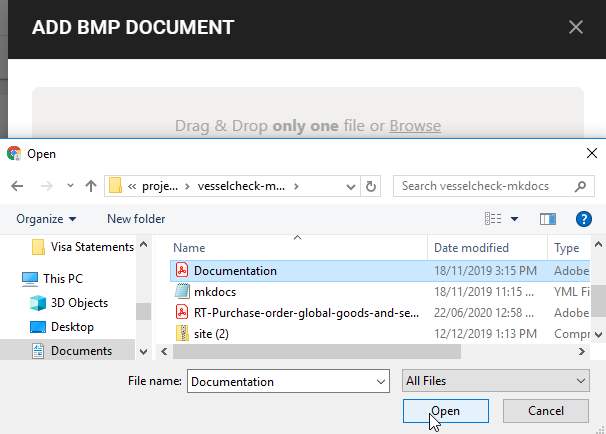
Step 5: Upload Documentation.
To Drag and drop file/s, left click on the file and drag to the blue lined box, drop the file/s.
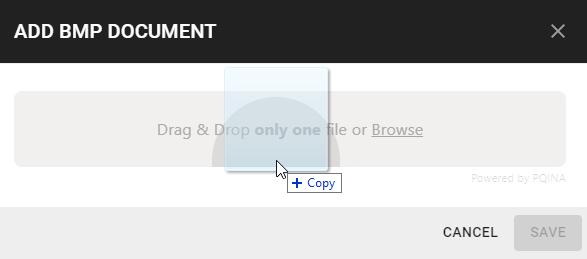
To upload from Browse files. Click to select the required file. Click Open.
The Documentation will now appear under Uploaded Documents.

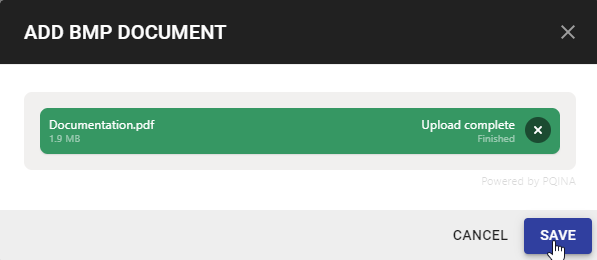
Step 6: Click Save.

The BMP Documentation Table will now show the Registered BMP.

To Edit the BMP, Click on the Edit Icon and click Save.

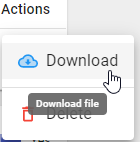
Download BMP
Step 1: Click the button underneath Actions.

Step 2: Click to Download the specified BMP Document.
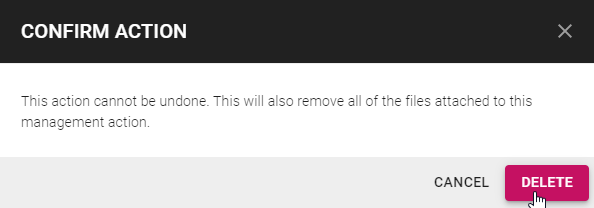
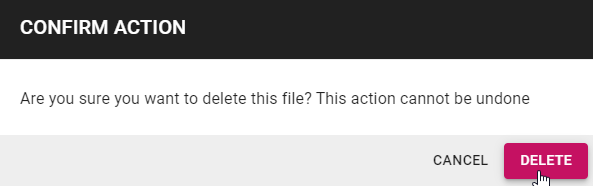
Delete BMP
Step 1: Click the button underneath Actions.
Step 2: Click the Delete button.
A dialogue box will appear confirming the deletion of the Niche Area. Click Delete.

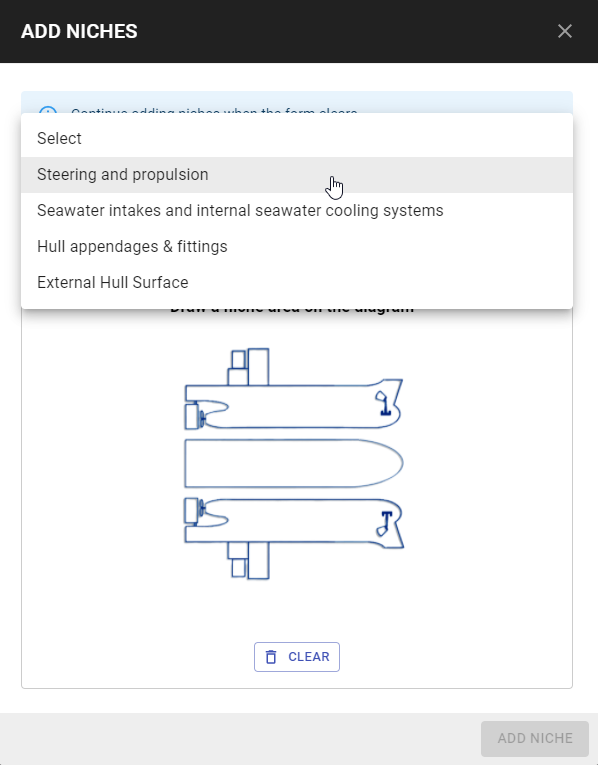
Add Niche
Step 1: Click Add Niche.

Step 2: Draw a niche area on the diagram. Use mouse to click and drag on the particular area.
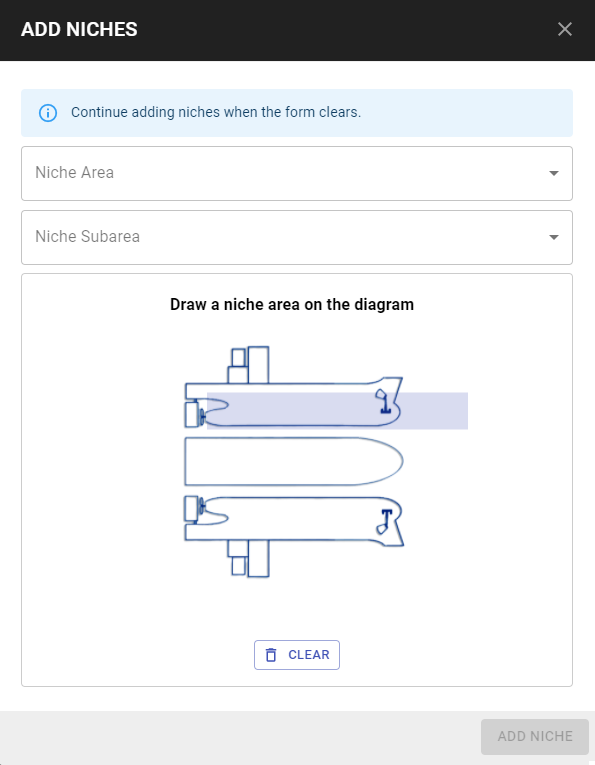
Step 3: Choose Niche Area from the drop down menu.
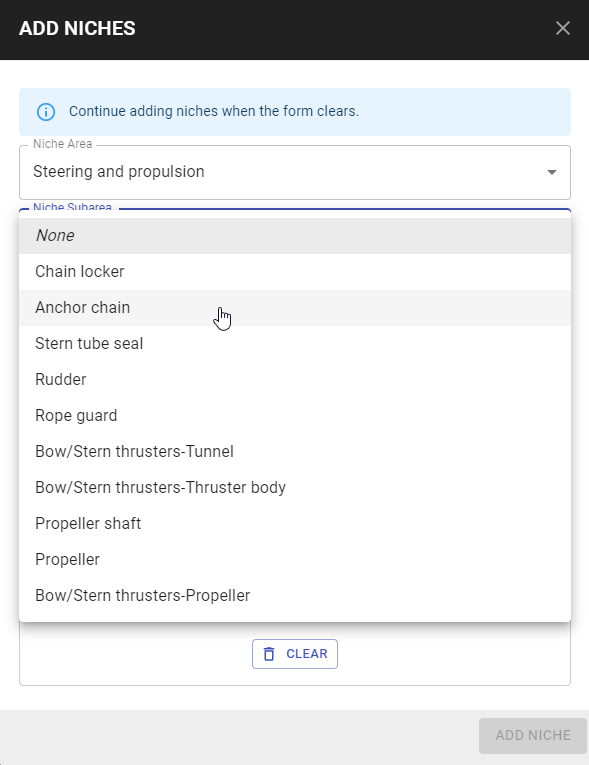
Step 4: Choose Niche Subarea from the drop down menu.
Step 5: Click Save.

Step 6: Once successful, the below notification will appear. The Niche will appear in the table.


Edit Niche
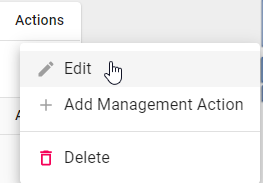
Step 1: Click on Actions and Edit.
Step 2: Edit as required. Click Add Niche.

Delete Niche
You can only delete a Niche if it is not selected in the AFC Documentation and the Record Book. This can be achieved by editing the relevant AFC Documentation entry Record Book entry and removing the Niche.
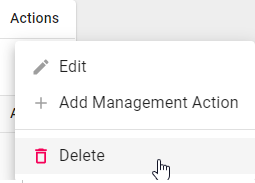
Step 1: Click on Actions and Delete.
Step 2: A dialogue box will appear confirming the deletion of the Niche Area. Click Delete.

Actions
Add Management Action
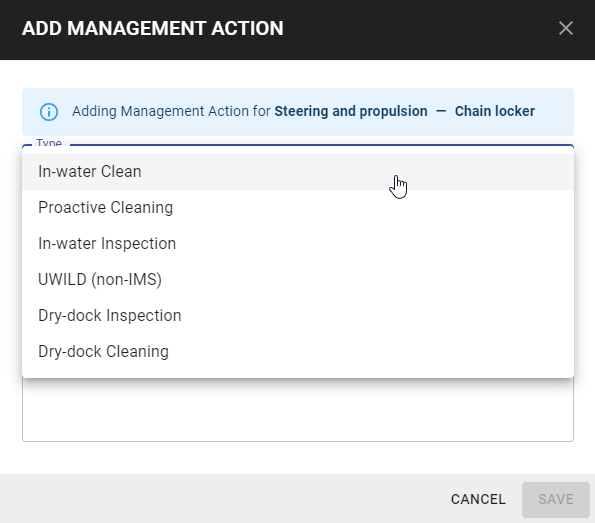
Step 1: Click on Actions and Add Management Action.

Step 2: Select Type from the drop down menu.
Step 3: Enter Interval in Months that the Management Action will be performed.
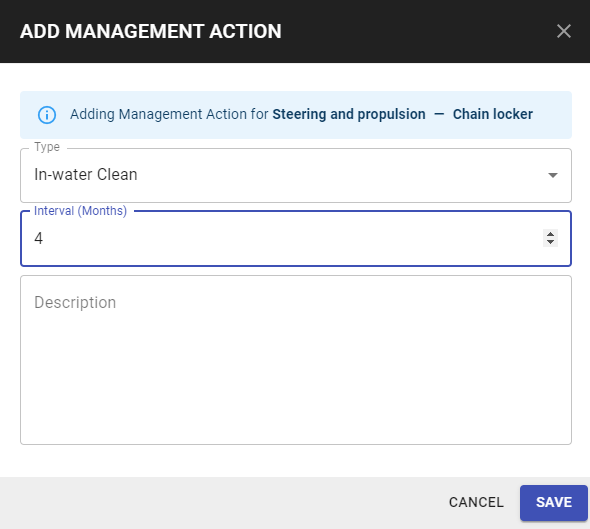
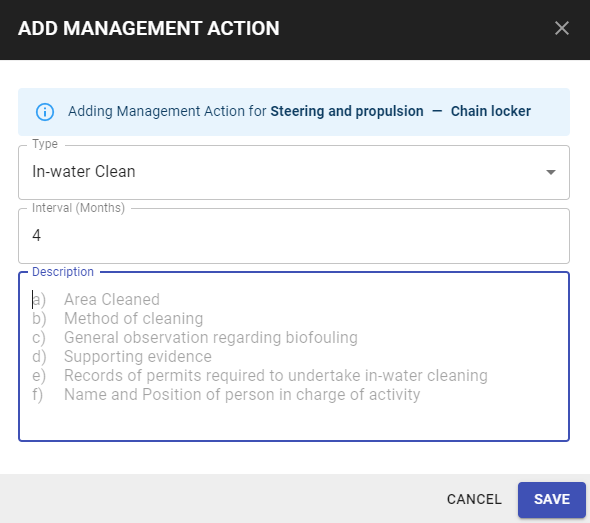
Step 4: Optional - Enter Description suggestions are listed, however add your own description to suit your own processes.
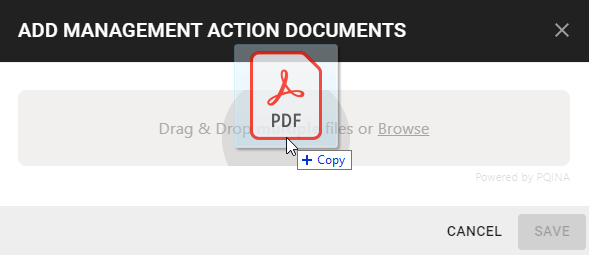
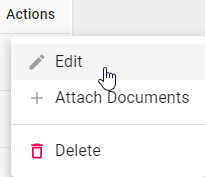
Step 5: Optional - To Upload Documentation Files. Click on the required Management Action and Click Actions > Attach Documents.

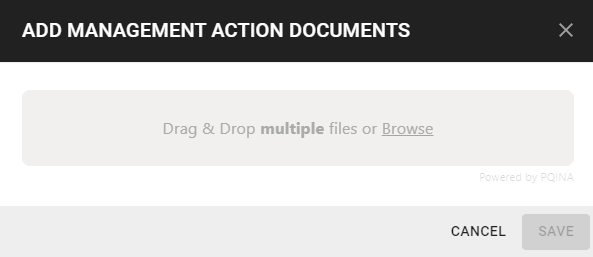
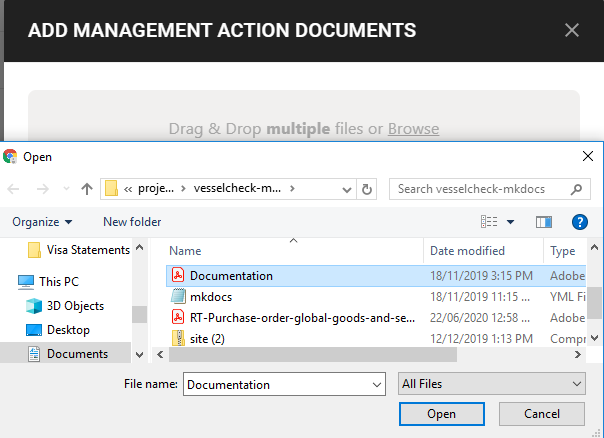
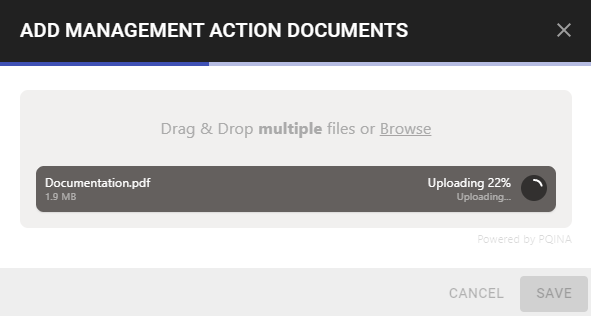
Step 6: Upload files uising Drag and drop or Browse.
To Drag and Drop file/s, left click on the file and drag to the blue lined box, drop file/s.
To upload from Browse files. Click to select required file/s. Multiple files can be selected. Click Open.
Successfully uploaded files will appear with a green tick. To remove any files, click the Bin Icon.
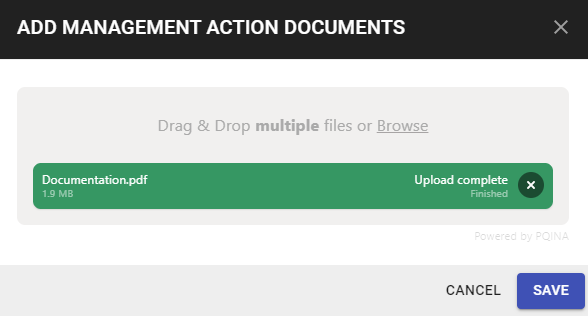
Step 7: Once all details are correct. Click Save.

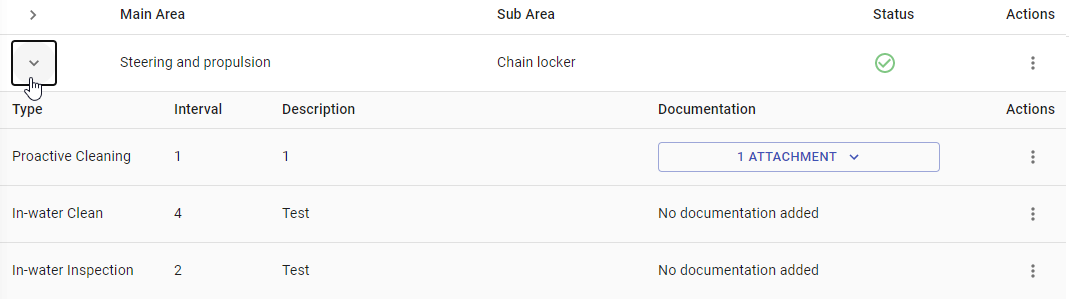
Step 8: Using the Left arrow the Management Action will be displayed under each Niche.

Show Management Action
To Show Management Actions for each Niche, Click on the Left Arrow to show list.
Edit Management Action
Step 1: Click on the Edit Icon.
Step 2: Edit as required. Click Save.

Delete Management Action
Step 1: Click on the Delete Icon.

Step 2: A dialogue box will appear confirming the deletion of the Management Action. Click Delete.